
 listicle
Popcorn Ceiling Removal Cost: Atlanta Pricing Guide
Table of Contents
- Average Popcorn Ceiling Removal Cost by Square Footage
- Factors Influencing Popcorn Ceiling Removal Costs
- Asbestos Testing for Popcorn Ceilings: Safety and Requirements
- The Popcorn Ceiling Removal Process Steps
- Cost to Skim Coat Ceiling After Texture Removal
- DIY vs. Professional Removal: Cost and Complexity
- Real Estate Value and Long-Term Benefits
- Frequently Asked Questions
Last Updated: September 30, 2026
Average Popcorn Ceiling Removal Cost by Square Footage
Popcorn ceiling removal cost varies significantly based on the size of your space. For most homeowners, the expense breaks down primarily by square footage, with labor making up the majority of the total investment. A typical removal project for a 200-square-foot room might run considerably less than a 1,000-square-foot open floor plan, though the per-square-foot rate often decreases as project size increases.
The relationship between room size and total cost isn't perfectly linear. Smaller projects carry higher overhead per square foot because setup, dust containment, and cleanup take similar time regardless of scope. Larger projects benefit from economies of scale, allowing crews to work more efficiently across extended ceiling areas.
According to Angi's regional cost data, homeowners should account for labor intensity when planning budgets. Factors like ceiling height, texture thickness, and whether asbestos is present all influence the final price. Dunwoody Painters provides detailed, line-by-line estimates that break down costs transparently, helping you understand exactly where your investment goes.
| Room Size | Typical Scope | Cost Factors |
|---|---|---|
| 200-300 sq ft | Single bedroom | Standard setup, shorter duration |
| 400-600 sq ft | Living area | Moderate complexity, standard texture |
| 800-1,200 sq ft | Multi-room or open floor | Higher labor, extended timeline |
| 1,500+ sq ft | Whole home | Maximum efficiency per sq ft |
The per-square-foot rate typically decreases as total area increases, but absolute project cost rises with scope. Understanding this relationship helps you budget accurately for popcorn ceiling removal cost work in your home.
Factors Influencing Popcorn Ceiling Removal Costs
Several variables determine the final price of your popcorn ceiling removal project. Ceiling height stands as one of the most significant cost drivers. Work at 10 feet requires different equipment and safety measures than work at 8 feet, and vaulted or cathedral ceilings add complexity and labor time.
Texture thickness matters considerably. Some popcorn applications are thin and scrape away easily; others are heavily applied and require more aggressive scraping, multiple passes, and extended labor. Thicker textures mean longer project duration and higher total costs.
Surface condition beneath the texture affects removal difficulty. If the drywall underneath is damaged, soft, or compromised, repair becomes necessary before finishing work can begin. This adds both materials and labor to your project scope.
Asbestos presence transforms the entire project scope and cost structure. Popcorn ceilings applied before the 1980s frequently contain asbestos, a hazardous material requiring specialized removal procedures. Testing costs money upfront, but identifying asbestos early prevents costly mid-project changes. Abatement follows strict environmental safety protocols that increase labor and disposal expenses significantly.
Accessibility and site conditions influence pricing. Rooms filled with furniture, artwork, or fixtures require careful protection and slower work. Open spaces allow crews to work faster. HVAC systems, light fixtures, and ceiling fans all need protection or removal before work begins.
Asbestos Testing for Popcorn Ceilings: Safety and Requirements
Asbestos testing represents a critical safety step that many homeowners overlook. Popcorn texture applied before 1980 frequently contains asbestos fibers, which pose serious health risks when disturbed. Testing identifies whether your ceiling contains this hazardous material before removal work begins.
Professional asbestos testing involves collecting small samples from your popcorn texture and submitting them to certified laboratories. Results typically arrive within a few days. Testing costs money upfront but prevents potentially dangerous exposure and ensures compliance with environmental regulations.
If testing confirms asbestos presence, removal requires specialized abatement contractors licensed to handle hazardous materials. These professionals follow strict containment, removal, and disposal protocols established by environmental agencies. The process takes longer and costs more than standard removal, but it protects your family and workers from serious health consequences.
EPA guidance on asbestos in homes emphasizes that undisturbed asbestos poses minimal risk. The danger emerges when materials are scraped, sanded, or otherwise disturbed, releasing fibers into the air. Professional abatement contractors understand these risks and implement appropriate safety measures.
Many homeowners choose to have testing done before requesting removal estimates. This allows contractors to provide accurate quotes that account for asbestos abatement if necessary. Dunwoody Painters can guide you through the testing process and connect you with qualified specialists if your ceiling requires asbestos abatement.
The Popcorn Ceiling Removal Process Steps
The popcorn ceiling removal process involves several distinct phases, each requiring specific techniques and equipment. Understanding the workflow helps you appreciate why professional removal costs what it does and why rushing the process creates problems.
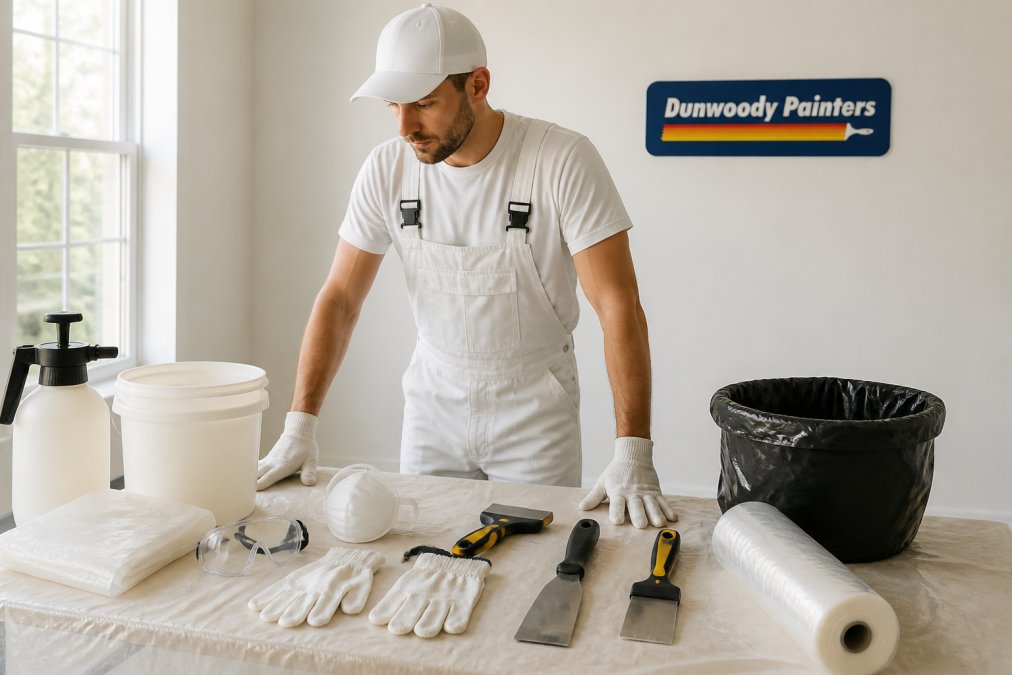
Step 1: Preparation and Protection Crews begin by protecting everything in the room. Plastic sheeting covers furniture, fixtures, and flooring. Drop cloths extend across the entire work area. HVAC vents, light fixtures, and ceiling fans receive careful covering. This setup takes several hours but prevents dust contamination throughout your home.
Step 2: Dust Containment Setup Professional crews establish dust containment systems using negative pressure equipment. This prevents popcorn particles from spreading beyond the work zone. Respiratory protection for workers and temporary barriers around doorways control dust migration. Proper containment adds cost but protects your home's air quality.
Step 3: Texture Scraping Workers use specialized scrapers and sometimes light moisture to soften the texture before removal. Scraping technique matters significantly. Aggressive scraping damages the drywall beneath; gentle scraping takes longer but preserves the ceiling surface. The scraping process generates considerable dust despite containment efforts.
Step 4: Drywall Inspection and Repair Once texture is removed, the underlying drywall condition becomes visible. Any damage, soft spots, or imperfections require repair. Minor damage needs joint compound; significant damage requires drywall patching. This phase directly impacts your final finish quality.
Step 5: Surface Preparation The ceiling receives thorough sanding to create a smooth, even surface. Sanding removes residual texture particles and creates the proper substrate for primer and paint. This step is labor-intensive and generates additional dust despite containment systems.
Step 6: Primer Application A quality primer seals the prepared drywall and ensures even paint coverage. Primer fills minor surface imperfections and prevents bleed-through from joint compound. Skipping primer or using low-quality primer results in uneven final finishes.
Step 7: Paint Application Final paint application typically requires two coats for proper coverage and durability. Quality paint provides better washability and longevity than budget options. The finish transforms your ceiling from textured to smooth, modern, and clean-looking.
Cost to Skim Coat Ceiling After Texture Removal
Skim coating represents an alternative finishing method that creates an ultra-smooth ceiling surface. After popcorn removal, some homeowners choose skim coating instead of standard sanding and painting. This technique involves applying a thin layer of joint compound across the entire ceiling surface.
Skim coating creates a perfectly smooth finish superior to sanded-and-painted ceilings. The process requires significant skill and experience. Professional skim coaters apply multiple thin coats, allowing proper drying between applications. This adds time and labor compared to standard finishing methods.
The technique works best on ceilings in good condition with no major damage. Heavily damaged ceilings require drywall repair before skim coating becomes viable. Skim coating costs more than standard finishing but delivers a high-end appearance that many homeowners prefer.
Professional skim coating requires experienced craftspeople.
DIY vs. Professional Removal: Cost and Complexity
Many homeowners consider DIY popcorn ceiling removal to save money. This decision requires honest assessment of your skills, equipment access, and willingness to manage dust and cleanup. The cost difference between DIY and professional work varies, but so does the quality outcome.
Real Estate Value and Long-Term Benefits
Removing popcorn ceilings delivers tangible benefits beyond immediate aesthetic improvement. The decision affects your home's market perception and long-term value. Smooth ceilings represent modern finishes that appeal to contemporary buyers and renters.
Frequently Asked Questions
Do I need to test for asbestos before removing a popcorn ceiling?
Yes. Popcorn ceilings installed before 1989 often contain asbestos, which is a hazardous material. Testing is essential before removal, if asbestos is present, you must hire a licensed abatement contractor. The EPA requires proper containment, respiratory protection, and certified disposal. Testing typically costs $200-$400 and takes 1-2 weeks for lab results. Professional contractors include asbestos assessment in their estimates.
How much does it cost to remove a 1,000 square foot popcorn ceiling?
Costs vary based on ceiling height, asbestos presence, surface preparation needs, and labor rates in your area. Professional removal for a standard 1,000 sq ft space typically ranges from several hundred to several thousand dollars. Factors like drywall repair, skim coating, and painting add to the total. Contact Dunwoody Painters for a detailed, line-by-line estimate specific to your project, we provide free estimates with no obligation.
Is popcorn ceiling removal worth the cost for home value?
Yes. Removing popcorn ceilings can increase home value and appeal to buyers. Modern smooth ceilings are easier to clean, reduce dust accumulation, and improve lighting. Real estate data shows homes with updated ceilings command higher prices and sell faster. Beyond resale value, homeowners report improved aesthetics, easier maintenance, and better air quality. The investment typically pays for itself through increased property value.
What's the difference between popcorn ceiling removal and skim coating?
Popcorn removal is the process of scraping away the textured material from your existing ceiling. Skim coating is the next step, applying a thin layer of joint compound to create a smooth, finished surface. Many contractors offer both services as a package. Skim coating requires surface preparation, primer, and paint to complete the project. The cost to skim coat a ceiling depends on square footage and drywall repair needs; your contractor will break this down in the estimate.
How long does professional popcorn ceiling removal take?
Timeline depends on square footage, ceiling height, and whether asbestos is present. Standard removal typically takes 2-5 days for an average home. If asbestos abatement is required, add 1-2 weeks for testing and specialized containment. Skim coating and painting add another 3-7 days. Dunwoody Painters manages every phase with detailed project scheduling to keep work on track and minimize disruption to your home.