 how-to
How to Manage Home Painting Schedules
Table of Contents
- Assess Your Project Scope and Timeline
- Interior Painting Project Timeline: Planning Before Work Begins
- How to Prepare Walls for Painting and Protect Your Home
- Create a Painting Schedule Template for Room Sequencing
- Build Schedule Buffers and Contingency Plans
- Manage Painters and Maintain Schedule Flexibility
- DIY Versus Professional Timelines and Occupied Home Considerations
- Frequently Asked Questions
Last Updated: October 13, 2026
Assess Your Project Scope and Timeline
Managing a home painting project starts with knowing how to manage home painting schedules by understanding exactly what needs painting and how long it will take.
Walk through your home and note every surface that needs paint: walls, ceilings, trim, doors, and more. One room or the entire interior? Is the exterior included?
Estimate the overall duration of a home painting project
A typical interior project takes 1-2 weeks with a professional crew, depending on room count, surface condition, repairs, and occupancy.
Here's what affects your overall timeline:
- Small rooms (bathrooms, hallways): 1-2 days each
- Medium rooms (bedrooms, kitchens): 2-3 days each
- Large spaces (living rooms, open layouts): 3-5 days
Many homeowners underestimate prep. Repairs, sanding, and cleaning happen before any paint goes on the wall, this is where schedules slip most often.
Identify which rooms and surfaces need painting
Create a room-by-room list noting wall and ceiling condition, trim and baseboards, doors and frames, and special surfaces like cabinets or built-ins. This inventory becomes your scope of work for coordinating with painters and tracking progress.
Interior Painting Project Timeline: Planning Before Work Begins
Before your crew arrives, understand paint drying and recoating. This helps you build a realistic schedule and know when a room can be used again.
Calculate drying and curing time between coats
Drying means the surface feels dry to the touch; curing means the paint has hardened completely and reached its final film properties.
Most interior latex paints dry to the touch in 1-4 hours, but a second coat requires the first to be fully dry, 4-8 hours for most quality paints.
Here's a practical timeline for a standard room:
- First coat application: 2-4 hours
- Drying time: 8 hours (overnight)
- Second coat application: 2-4 hours
Curing matters: paint keeps hardening for days. Wait at least 24 hours before moving furniture back, and 48 hours in high-traffic areas if possible.
How temperature, humidity, airflow, and paint type change the clock
Drying and curing times move with four variables:
Temperature. Latex paint applies between roughly 50°F and 85°F. Below 50°F, film formation slows or stops; above 85°F, the paint skins over too fast, trapping solvent and causing lap marks. In a cold snap, hold the room at 65°F or higher through the cure window.
Humidity. High humidity is the biggest schedule killer for interior work. At 70% RH, a coat that dries in 4 hours at 40% RH can take 8-12 hours.
Airflow. Moving air carries moisture away from the film. A box fan on low, aimed at a wall but not directly at wet paint, cuts drying time; cross-ventilation is even better.
Paint type. Different products have different recoat windows printed on the label:
- Standard latex wall paint: recoat in 4-8 hours; full cure in about 30 days.
- 100% acrylic: recoat in 4-6 hours; better adhesion and durability than vinyl-acrylic.
- Alkyd (oil-based) enamel: recoat in 16-24 hours; full cure in 7-30 days. Slower, but harder finish.
Always read the manufacturer's data sheet, the label's recoat window overrides any general rule.
When can the room be used again?
A practical rule set for reusing the room:
- Light foot traffic: after the final coat is touch-dry, typically 4-8 hours.
- Moving furniture back in: after 24 hours minimum; 48 hours for heavy pieces against a wall.
- Hanging pictures or shelves: after 7 days; the film is still soft and a nail can tear it.
Account for surface preparation and repairs
Surface prep is the difference between a paint job that lasts 3 years and one that lasts 10. It includes washing walls, sanding rough spots, filling holes and cracks, priming bare wood or new repairs, and taping trim and baseboards.
Plan for at least one prep day before painting begins. If your home has older paint, plaster damage, or hasn't been painted in many years, add extra prep time.
How to Prepare Walls for Painting and Protect Your Home
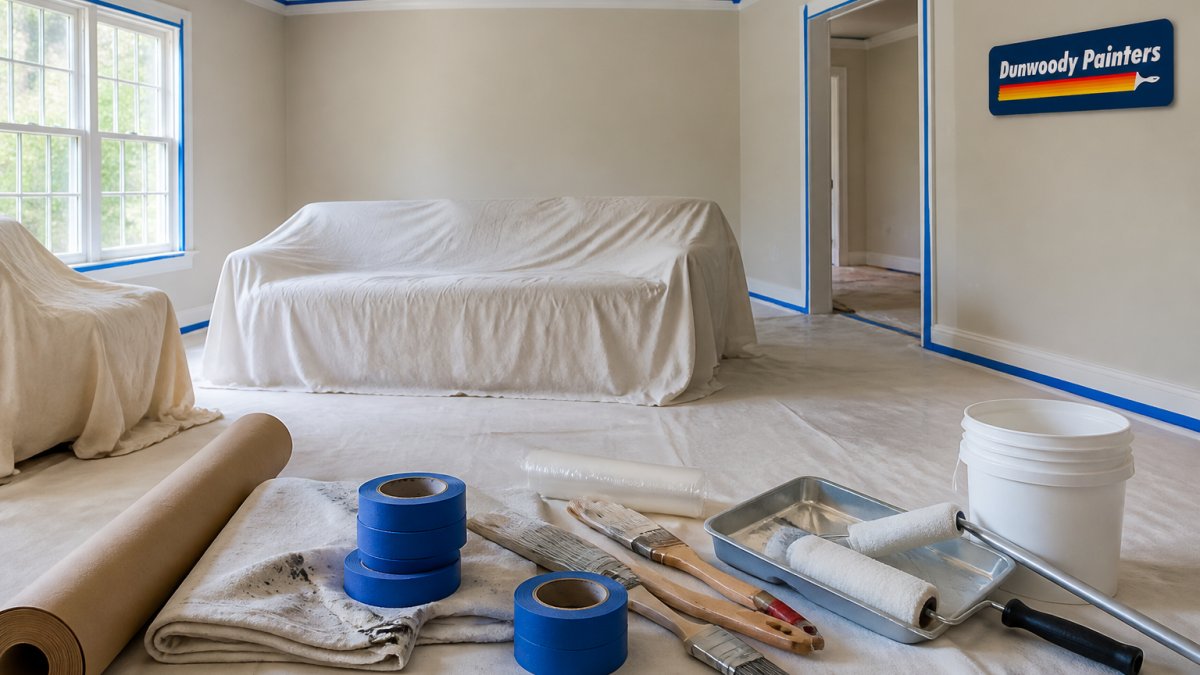
Protecting your home during painting keeps your belongings safe and helps your crew work faster.
Remove or cover furniture and belongings
Move furniture out if possible; otherwise push it to the center and cover it with plastic sheeting or old sheets. Painters need clear wall and floor access.
For items you're leaving in place:
- Cover with plastic or drop cloths
- Remove picture frames and wall décor
- Take down light fixtures if possible
Budget 2-4 hours to prepare a bedroom or living room, and 1-2 hours for a kitchen or bathroom. The more you prepare, the faster your crew starts painting.
Prepare rooms and surfaces before the crew arrives
Your painter does final prep, but you can speed things up: wipe walls with a damp cloth so paint adheres better, clear closets and cabinets being painted, and discuss wallpaper or popcorn ceiling removal before scheduling. Protect floors with drop cloths or plastic sheeting, even experienced painters drip.
Create a Painting Schedule Template for Room Sequencing
A smart way to manage home painting schedules minimizes disruption, especially in an occupied home. The templates below turn general advice into a day-by-day plan.
Break work into rooms and phases
Divide your project into phases based on how you use your home:
- Phase 1, Sleeping and bathing spaces. Bedrooms and bathrooms go first so occupants can relocate to common areas for a night or two.
- Phase 2, Circulation and secondary rooms. Hallways, stairwells, laundry rooms, and home offices.
- Phase 3, High-use common areas. Living room, dining room, kitchen, and any open-plan space that ties them together.
This keeps some rooms usable while others are painted. Paint your bedroom Monday, sleep elsewhere one night, and it's typically back in service by Tuesday evening.
Sample schedule: small home (1 bedroom, 1 bathroom, ~700-900 sq ft)
| Day | Work | Rooms | Notes |
|---|---|---|---|
| 1 | Masking, minor prep, prime patched areas | Bedroom, bath, hall | Occupant can stay in living area |
| 2 | Ceilings and walls, coat 1 | Bedroom, bath, hall | Sleep in living room or elsewhere |
| 3 | Walls, coat 2; trim coat 1 | Bedroom, bath, hall | Keep windows open for airflow |
| 4 | Trim coat 2; touch-ups | All | Furniture back after 24-hour cure |
| 5 | Living area prep and coat 1 | Living, kitchen | Move small items out the night before |
| 6 | Living area coat 2; trim | Living, kitchen | , |
| 7 | Final touch-ups, walkthrough | All | Buffer day if anything slipped |
Sample schedule: medium home (3 bedrooms, 2 bathrooms, ~1,800-2,200 sq ft)
| Day | Work | Rooms | Notes |
|---|---|---|---|
| 1 | Prep, masking, minor repairs | All bedrooms, hall bath | , |
| 2 | Ceilings and walls, coat 1 | Bedrooms 1-2 | , |
| 3 | Walls coat 2; trim coat 1 | Bedrooms 1-2 | , |
| 4 | Ceilings and walls, coat 1 | Bedroom 3, hall bath | , |
| 5 | Walls coat 2; trim | Bedroom 3, hall bath | , |
| 6 | Prep and coat 1 | Hallways, stairs | Keep path clear |
| 7 | Coat 2 and trim | Hallways, stairs | , |
| 8 | Prep and coat 1 | Living, dining | , |
| 9 | Coat 2 | Living, dining | , |
| 10 | Kitchen prep and coat 1 | Kitchen | Clear counters and upper cabinets |
| 11 | Kitchen coat 2 and trim | Kitchen | , |
| 12 | Touch-ups, walkthrough | All | Buffer day |
Sample schedule: large home (4+ bedrooms, 3+ bathrooms, 3,000+ sq ft)
Large homes are usually run with two crews or a larger crew working in parallel zones. A typical two-week plan:
| Day | Work | Zone | Notes |
|---|---|---|---|
| 1-2 | Prep, masking, repairs | All | Split across zones |
| 3-4 | Ceilings and walls, coat 1 | Bedrooms wing | , |
| 5-6 | Walls coat 2; trim | Bedrooms wing | , |
| 7-8 | Ceilings and walls, coat 1 | Bathrooms and hallways | , |
| 9-10 | Coat 2 and trim | Bathrooms and hallways | , |
| 11-12 | Coat 1 and 2 | Living, dining, office | , |
| 13-14 | Kitchen and final touch-ups | Kitchen, all | Buffer built into day 14 |
Coordinate work sequence to minimize disruption
If people live in your home during painting, keep the most-used spaces available as long as possible: paint bedrooms early and save the kitchen and living areas for last.
A few sequencing rules that hold across home sizes:
- Never paint the only bathroom and the only bedroom on the same day. Stagger them so at least one of each stays usable.
- Paint ceilings before walls, and walls before trim. Overspray and drips from above land on surfaces that haven't been finished yet.
- Paint trim after walls cure. Tape removal can pull fresh wall paint if the wall hasn't had time to set.
Discuss your schedule with your painter before work starts. Professional crews build schedules around your needs, since occupied homes require different planning than vacant ones.
Confirm which rooms will be painted each day, and ask about access times and disruptions. A crew that keeps you informed keeps your schedule on track.
Build Schedule Buffers and Contingency Plans
No painting project goes perfectly. Weather delays, unexpected repairs, and supply issues happen. A good schedule includes buffer time.
Plan for weather delays and unexpected repairs
Weather affects exterior painting significantly, rain, humidity, and temperature extremes slow drying, so add 2-3 buffer days for exteriors. Prep also reveals surprises like hidden water damage or rotted trim, which add days. Build a 2-3 day contingency buffer into every project: finish early if nothing goes wrong, avoid scrambling if problems appear.
Establish key workdays and communication checkpoints
Mark critical days when specific work must be completed to stay on track. Schedule weekly check-ins about progress, weather, and issues for early warning. Confirm the completion date in writing before work begins, a professional painter provides a detailed timeline with start and end dates.
Manage Painters and Maintain Schedule Flexibility
Even with perfect planning, schedules need adjustment. The key is managing changes without derailing your entire project.
Coordinate with your painting crew and other trades
If other trades are working alongside painting (flooring, electrical, plumbing), coordinate carefully, painting typically happens after they finish, since construction dust interferes with paint quality. Provide clear access and parking, and discuss pets or security upfront. Ask about crew size and hours: Our crews typically work 7 AM to 4 PM on weekdays.
Track progress and adjust timelines as needed
Check in daily if possible, walking through painted areas against your original plan so you know early if the crew is ahead or behind. Be flexible: if a room needs extra prep, adding a day beats rushing and getting poor results. Document any schedule changes in writing to prevent misunderstandings about scope and end date.
DIY Versus Professional Timelines and Occupied Home Considerations
Painting yourself versus hiring professionals changes your timeline dramatically. DIY takes 2-3 times longer: a professional paints a bedroom in one day, while a homeowner typically needs 2-3 days of evenings and weekends.
For occupied homes, professional painters are especially valuable: they minimize disruption, protect belongings, and sequence work so your family stays comfortable.
Frequently Asked Questions
How long does it take to paint the interior of a house?
Interior painting timelines vary based on home size, number of rooms, surface condition, and whether prep work is needed. A typical single-story home with 3-4 bedrooms may take 5-10 days with a professional crew, while two-story homes or extensive surface repairs can extend timelines to 2-3 weeks. Drying and curing time between coats adds 24-48 hours per coat depending on humidity and paint type. Professional painters factor in prep, priming, multiple coats, and cleanup within these estimates.
What is the best order to paint rooms in a house?
Start with high-traffic areas like hallways and entryways first, then move to bedrooms and living spaces, and finish with kitchens and bathrooms. This sequence minimizes disruption to daily routines and allows rooms to cure while others are being painted. Paint ceilings before walls, trim after walls, and save rooms you use most frequently for last so they're fully cured before occupancy. Coordinate with your painting crew to establish this sequence during project planning.
How should I use a painting schedule template to manage my project?
A painting schedule template should list each room or area, surface types (walls, ceilings, trim, doors), prep tasks, paint application phases, drying time between coats, and key workdays. Block out dates for prep, first coat, second coat, and final inspection. Include buffer days for weather or unexpected repairs. Share the template with your painting crew to align expectations and track progress weekly. This keeps your project on track and ensures everyone knows when rooms will be accessible and when completion is expected.
How do I live in a house while it is being painted?
Coordinate room sequencing so painters work in one area while you occupy others. Establish clear daily disruption windows with your crew and plan to be out of the home during heavy prep or priming. Use protective coverings on furniture and seal off painted rooms during drying time. Plan meals and routines around active work areas. Professional painters minimize dust and odor, but ventilation and scheduling communication prevent major disruptions. Discuss occupancy constraints with your painting crew during the estimate so they can plan accordingly.
Managing a home painting schedule requires planning, clear communication, and realistic expectations. The best approach breaks your project into phases, accounts for drying and curing time, and builds in buffer days for unexpected issues. When you hire professional painters, you gain expertise in scheduling and the ability to adjust timelines as needed. Schedule a free estimate with Dunwoody Painters to discuss your specific project and get a detailed timeline that fits your home and your life.