
 how-to
Avoiding Common House Painting Mistakes: A 2026 Guide
Table of Contents
- Why Surface Preparation Is Non-Negotiable
- Selecting the Right Paint Finish for Your Home
- Best Weather for Exterior House Painting
- Tools Needed for Professional House Painting
- Common Application Mistakes and How to Avoid Them
- Post-Painting Maintenance and Touch-Up Techniques
- Eco-Friendly Paint Choices and Low-VOC Considerations
- Budgeting for Hidden Costs in Your Painting Project
- Frequently Asked Questions
Last Updated: September 21, 2026
Avoiding common house painting mistakes starts before you ever open a paint can. Most homeowners skip the prep work, choose the wrong tools, or ignore environmental conditions. The result is a finish that peels, cracks, or looks uneven within months. This guide covers what actually matters when painting your home, and how to avoid the pitfalls that waste time and money.
Over 15 years serving metro Atlanta, Dunwoody Painters has learned which shortcuts cost homeowners thousands in touch-ups and repaints.
Why Surface Preparation Is Non-Negotiable
Surface preparation determines everything. Poor prep with good application will hold for years; perfect application on a dirty wall will fail within months.
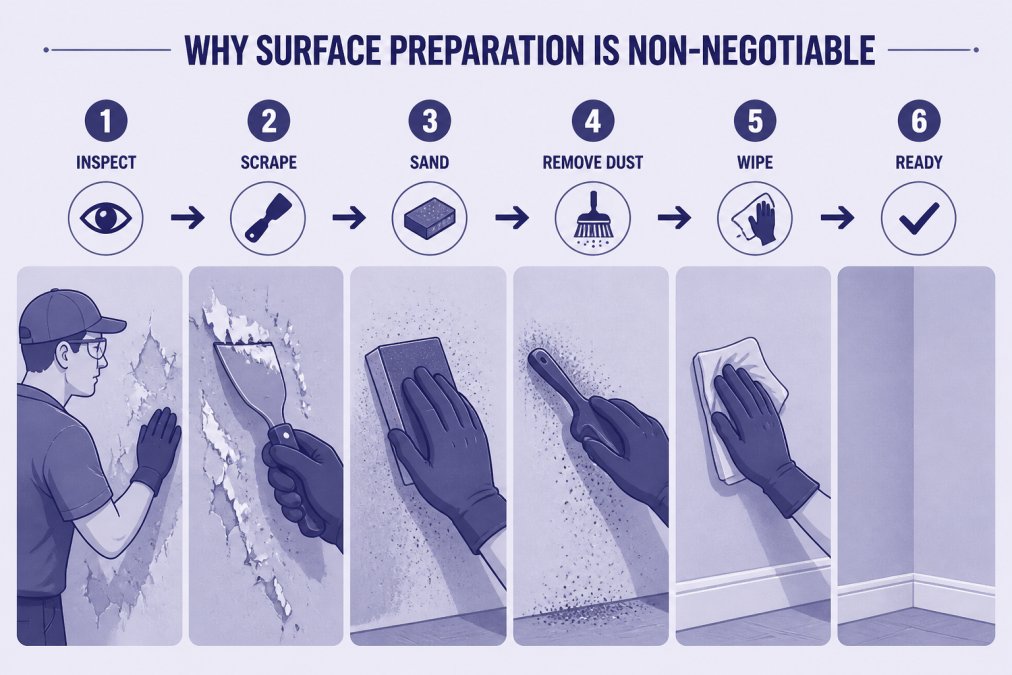
Most homeowners spend 20% of their time on prep and 80% on painting, it should be reversed. Proper preparation prevents peeling, ensures adhesion, and makes painting faster and easier.
Skipping the Cleaning Step
Dirt, dust, and grime block paint adhesion. Paint sits on contamination instead of the wall, causing peeling within weeks.
Clean your walls with a degreaser if they're in a kitchen or bathroom. Use a damp cloth for general dust. Let the surface dry completely before priming or painting. This single step prevents more failures than any other.
For exterior surfaces, pressure wash 24 hours before painting to remove mold, mildew, and weathered paint. Allow 48 hours drying time.
Neglecting Sanding and Patching
Uneven surfaces telegraph through paint. Holes, cracks, and blemishes become more visible after painting, especially under glossy finishes.
Fill holes and cracks with spackle or caulking compound, then sand smooth. For larger damage, use two-part filler and sand until flush with the wall.
Light sanding on glossy surfaces improves adhesion. Use 120-150 grit for interior work, 80-100 grit for exterior.
A tack cloth removes sanding dust before priming. This prevents dust from embedding in your new finish.
Selecting the Right Paint Finish for Your Home
Paint sheen determines durability, appearance, and maintenance requirements. Choosing the wrong finish leads to regret.
Flat finishes hide imperfections but resist moisture poorly. Use in bedrooms and living rooms where durability matters less.
Eggshell and satin finishes balance durability and appearance. They resist moisture better than flat and work well in kitchens and bathrooms.
Semi-gloss and high-gloss finishes resist moisture and clean easily but show every imperfection. Use on trim, doors, and cabinets.
For exterior painting, choose semi-gloss or satin rated for your climate, they resist UV damage and moisture better than flat finishes.
The Metamerism Problem: Why Your Color Choice Looks Different at Home
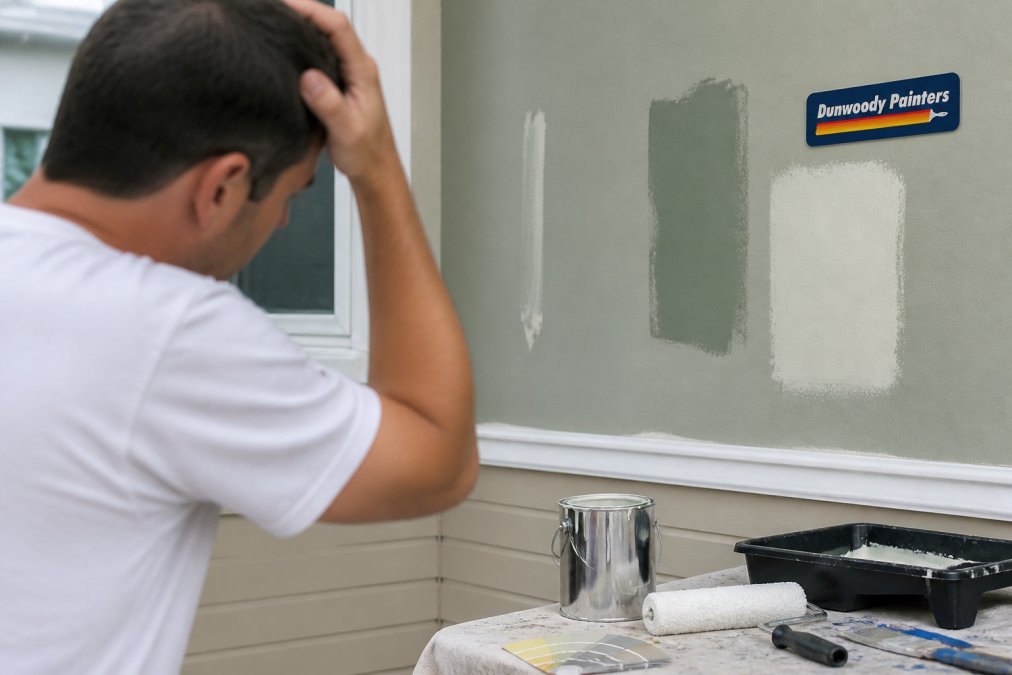
A common mistake is selecting paint color under store lighting, then being shocked when it looks different at home. This is metamerism, the same color appears different under different light sources.
Store lighting (cool fluorescent or LED) shifts color perception. Your home's warmer incandescent or natural light renders the same color differently, a neutral beige may appear peachy, a cool gray may look blue.
To avoid this mistake:
- Buy sample pots and paint 2-foot swatches on your actual walls.
- Observe at different times of day. Live with samples 2-3 days before committing.
- Test in the room where it will be used. North-facing and south-facing rooms render colors differently.
- Remember finish affects perception. Flat finishes appear darker; satin and semi-gloss appear brighter.
- Check the paint's LRV (Light Reflectance Value). This 0-100 number indicates how much light a color reflects. Darker colors feel heavier in small spaces; lighter colors feel more open.
Best Weather for Exterior House Painting
Temperature, humidity, and sunlight control whether paint cures properly. Painting in poor conditions guarantees poor results.
Temperature matters most. Most latex paints require 50-85°F; oil-based paints need 45-90°F. Below these ranges, paint won't cure properly and may remain tacky or peel within weeks. Heat above the range causes surface skinning while paint remains wet underneath, creating bubbles and blistering.
Humidity is the second critical factor. High humidity slows evaporation and extends drying time. Above 85% humidity, moisture prevents water from evaporating, preventing proper film formation and causing blistering or adhesion failure.
Dew point is the hidden variable most DIYers ignore. If surface temperature drops below the dew point, moisture condenses on wet paint, ruining the finish. Check the dew point before painting (most weather apps include it) and paint only if surface temperature will stay at least 5°F above it for 24 hours.
Sunlight exposure changes how paint cures. Direct sun speeds drying but causes lap marks and uneven color. Paint shaded areas first, then sun-exposed sections as shadows shift.
Avoid painting in direct rain or when rain is forecast within 24 hours. Water washes away wet paint and prevents proper curing. Check the forecast for the full drying window, not just application day. Even light rain or heavy dew can compromise a fresh finish.
Ideal conditions: 60-75°F, 40-70% humidity, dew point at least 5°F below current temperature, and no rain for 24 hours. Early morning or late afternoon offers the best conditions with moderate temperatures and lower humidity.
Tools Needed for Professional House Painting
Quality tools matter more than most homeowners realize. Cheap brushes shed bristles into your finish. Poor rollers leave marks and require extra coats.
Invest in good brushes. Natural bristle brushes work best with oil-based paints. Synthetic brushes suit latex paints. A 2-inch angled brush handles trim and cut-in work. A 3-inch brush covers larger flat areas. Budget for brushes that cost $8-15 each, they're worth it.
Choose the right roller. A 3/8-inch nap roller works for smooth drywall. A 1/2-inch nap handles textured surfaces. A 1/4-inch nap is too short for most walls. Roller frames should have a sturdy handle and smooth rotation.
Use painter's tape to protect trim, baseboards, and adjacent surfaces. Low-adhesion tape prevents damage to paint underneath. Apply tape firmly, pressing the edge down to prevent paint seepage.
Drop cloths protect floors and furniture. Canvas drop cloths are reusable and professional-grade. Plastic sheeting works but is slippery and noisy. Lay drop cloths before opening paint cans.
Other essentials include a paint tray, extension pole, primer, and a caulking gun for filling gaps. A quality paint roller and brush reduce application time and improve finish quality.
Common Application Mistakes and How to Avoid Them
How you apply paint determines the final appearance. Poor technique creates problems no amount of extra coats can fix.
Using Painter's Tape Incorrectly
Painter's tape prevents paint from bleeding onto trim and adjacent surfaces. Applied wrong, it does the opposite.
Press tape firmly along the entire edge. Smooth it down with a plastic tool or your finger. Loose tape allows paint to seep underneath. For best results, apply tape 1/8 inch away from the surface you're protecting, this creates a crisp line without trapping paint.
Remove tape while paint is still slightly tacky, not fully dry. Pulling tape off dry paint can damage the finish or lift paint from the wall. Wait 30-60 minutes after painting, then slowly peel the tape at a 45-degree angle.
Overworking the Paint and Creating Lap Marks
Lap marks appear as visible lines where one stroke overlaps another. They're caused by repainting an area that's already partially dry.
Apply paint in one direction and maintain a wet edge. Work in sections about 3-4 feet wide. Don't go back and "fix" areas, let them dry and evaluate. Overworking creates more problems than it solves.
Brush strokes should be smooth and deliberate. Don't press hard or scrub the paint into the surface. Let the paint do the work. A light touch with quality tools produces better results than aggressive application.
For roller work, use a W or M pattern to distribute paint evenly. Fill in the pattern without lifting the roller. Maintain consistent pressure and speed. Rolling too slowly leaves marks; rolling too fast creates bubbles.
Painting in Poor Lighting
You can't see what you're doing without proper light. Shadows hide drips, uneven coverage, and missed spots.
Paint during daylight hours when possible. For interior work, use work lights positioned to illuminate the surface from multiple angles. Avoid backlighting, which creates shadows and hides imperfections.
Check your work frequently. Step back and look at the wall from different angles. Natural light and artificial light reveal different issues. What looks fine under work lights may show problems in daylight.
Post-Painting Maintenance and Touch-Up Techniques
Paint isn't finished when the last coat dries. Proper maintenance extends the life of your finish and keeps it looking fresh.
Touch up small scratches and scuffs promptly. Keep leftover paint in a sealed container for months or years.
Eco-Friendly Paint Choices and Low-VOC Considerations
Low-VOC (volatile organic compound) paints emit fewer harmful chemicals than traditional paints. They're better for indoor air quality and the environment.
Budgeting for Hidden Costs in Your Painting Project
Paint and labor are obvious costs. Hidden expenses surprise homeowners and blow budgets.
Frequently Asked Questions
Why is surface preparation the most important step in house painting?
Surface preparation determines whether your paint adheres properly and lasts. Dirt, loose paint, and uneven surfaces prevent the topcoat from bonding. When you skip this step, paint peels, cracks, or flakes within months. Proper cleaning, sanding, patching, and priming create a stable foundation that makes the difference between a finish that lasts years and one that fails quickly.
What weather conditions should be avoided when painting a house?
Avoid painting when temperatures are below 50°F or above 85°F, as paint won't cure properly. High humidity (above 85%) traps moisture and causes adhesion problems and blistering. Rain within 24 hours of painting washes away wet paint. Direct sunlight causes the paint to dry too fast, creating lap marks and uneven coverage. Overcast days with moderate humidity and temperatures between 60-75°F are ideal.
How can I avoid visible brush marks and lap marks?
Use the right tool for the job: rollers for large flat surfaces, brushes for trim and edges. Apply thin, even coats rather than one thick coat. Don't overwork the paint by going over the same area repeatedly. Maintain a wet edge by working in sections before the paint dries. Quality brushes and rollers hold more paint and distribute it more smoothly than cheap ones. Proper lighting helps you spot marks before they dry.
What's the catch with 'no payment until complete' painting services?
There's no catch when you work with a reputable company. This policy protects you by ensuring the painter finishes the job to your satisfaction before collecting payment. It aligns the contractor's incentive with your satisfaction. Dunwoody Painters backs this with a written 2-year workmanship warranty, so you have recourse if issues arise after completion. Always verify the company is licensed and insured before hiring.